Tuesday, August 26, 2014

Meet Featured Artists Dale and Kimberly Edwards of Redbird Designs for Your Nest!

What is your business’ name? Redbird Designs for Your Nest and we are Dale and Kimberly Edwards!

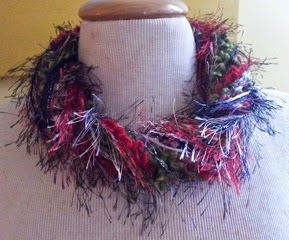
What sort of items do you make? Our philosophy is “Handmade Items from Our Nest to Yours.” Kimberly makes flowers from recycled materials, including common kitchen and other household items. She also makes mason jar crafts and beautiful yarn necklaces. Dale does oil paintings and other artwork on Readers Digest book covers.

When and how did you learn your craft? Kimberly, who has always been driven by creativity, taught herself to knit about 12 years ago using the book, “Stitch ‘n Bitch.” She began making soda-can flowers two years ago, and the idea for more elaborate blooms ‘grew’ from there. Dale, who is a graphic designer, took up oil painting about four years ago in the basement of their home.

Where do you get your inspiration from? Kimberly: “I’m inspired by looking outside the box. I like to take everyday and common materials and use them in a unique and creative way.” Dale: “I like to take complicated images and strip away the details, leaving simple, almost stark, graphic images. I’m inspired by wide-open spaces and utilitarian buildings.”

How did you get started doing this as a business? The business side of our arts and crafts passion began when Dale was invited to take part in Art in the Arboretum. His success from that show led to participation in other events. At first, Kimberly would join Dale at the art shows as his companion. However, it was only a matter of time before Kimberly’s talents were recognized and she was also invited to take part in shows. Now, we enjoy doing arts and crafts shows together.

Do you have any advice for other crafters/artisans just starting out? Network and build relationships with other artisans and crafters. That has helped us tremendously. Also, learn to pack your vehicle efficiently.

Anything else you would like to share? Don’t be afraid to try different venues. We’ve done church sales, farmers markets, craft shows, art exhibits and other shows, local and out of town. The more you put yourself out there, the more business you’ll attract.

Redbird Designs has a booth at Design Archives in downtown Greensboro. Dale regularly writes on his blog – daleedwardspaintsinhisbasement.blogspot.com – and is on Etsy under the name Tatestreet. You can see Dale’s artwork and Kimberly’s creations on the Redbird Designs Facebook page at: https://www.facebook.com/Redbirddesignsforyournest


Redbird Designs for Your Nest will be a featured artist at the First Friday Indie Market on September 5, 2014.  The market is located on the corner of MLK and Elm St in Downtown Greensboro, NC and is open from 4-9 pm.

Monday, August 18, 2014

Meet Featured Artist Susan Weimer of Itty Bitty Animals!

What is your business’ name? Itty Bitty Animals (Adoption
Center) and I’m Susan Weimer!

What sort of items do you make? This is a low-tech as you can get. There is no sewing machine involved, but only a needle and a thread. With a pattern, hand-sewn sheep, calves, penguins, birds, reindeer, pigs, flamingos, rabbits, and pandas can be fashioned before your very eyes. Since they are hand sewn, each animal is distinctly different. Each animal is given a name and a fictitious history is created. The history describes where the animal was found, a little bit about its personality, and information on its likes and dislikes.

I also make Itty Bitty Friendship Hearts which can be passed on to friends and relatives or just to keep for yourself.

When and how did you learn your craft? I am a retired school teacher who was looking to develop a crafting hobby during retirement. I did a lot of sewing of garments and even darned socks! I never thought of sewing as a career choice or even as a hobby. I started out when I found a project to make a reindeer in a Better Homes and Garden Christmas book. I had a lot of trouble getting it put together correctly, but I love challenges and kept working at it until I got it right. Then I moved into making birds for the Piedmont Bird Club’s 75th anniversary in April, 2013. I distributed them as table favors and everyone seemed to enjoy them.

Where do you get your inspiration from? I am surrounded by dogs, cats and fish. I love animals and I like to imagine what it would be like to be that animal and picture its story in my mind. Another source of inspiration is Antiques Roadshow. I want my collection to be thought of as “collectibles.” Adopt the animals now, and in 20 – 30 years, they will be worth much more. You can think of it as investment.

How did you get started doing this as a business? My first experience was a December craft fair at St. Pius X School. I literally sold out and was hooked from then on. I gradually signed up for more craft fairs which were not quite as successful but my initial success spurred me on to continue. I also took a business class sponsored by the Chamber of Commerce in conjunction with the Small Business Center.

Do you have any advice for other crafters/artisans just starting out?Network – network – network. I highly recommend looking into the Business Readiness Certification which is an educational program in collaboration with the Greensboro Chamber of Commerce and Guilford Technical Community College – Small Business Center. This will provide not only the background you need to be successful in business, but it will enhance your connections with the business people around you. Check the Internet for local craft stores that will support your product and check the availability of craft fair opportunities to promote your product and get exposure.

No matter what your career is, always have some kind of hobby. It doesn’t have to be something you make with your hands; it could just be collecting things. Your hobby doesn’t necessarily need to grow into a business, but it needs to be fulfilling for you.


Itty Bitty Animals (Adoption Center) will be a featured artist at the First Friday Indie Market on September 5, 2014.  The market is located on the corner of MLK and Elm St in Downtown Greensboro, NC and is open from 4-9 pm.


Tuesday, August 12, 2014

Meet Featured Artist Gerald Heins of Wood Creations by Jerry!

What is your business’ name?  Wood Creations by Jerry and I’m Gerald Heins!

What sort of items do you make? Woods bowls, trinket boxes, bud vases, cutting boards, earring trees, and candle holders.

When and how did you learn your craft? I started turning bowls during the summer of 2009.  I am self-taught on the wood lathe.

Where do you get your inspiration from? After retiring from Green Bay Packaging in 2006, I needed a hobby and was always interested in wood creations.  As I start the turning process, the grain of the wood helps me decide what the outcome will be.

How did you get started doing this as a business? My wife inspired me to take my crafts to a show.  Interest was very high in my items and I decided to continue selling my product.

Do you have any advice for other crafters/artisans just starting out? Have fun and don’t give up when you get frustrated.


Anything else you would like to share? I really enjoy all the people I meet through the different shows I attend but especially at First Friday.

Wood Creations by Jerry  will be a featured artist at the First Friday Indie Market on September 5, 2014.  The market is located on the corner of MLK and Elm St in Downtown Greensboro, NC and is open from 4-9 pm.

Tuesday, July 29, 2014

Featured Artist EBL Designs' Tutorial on Alcohol Ink Tile Coasters

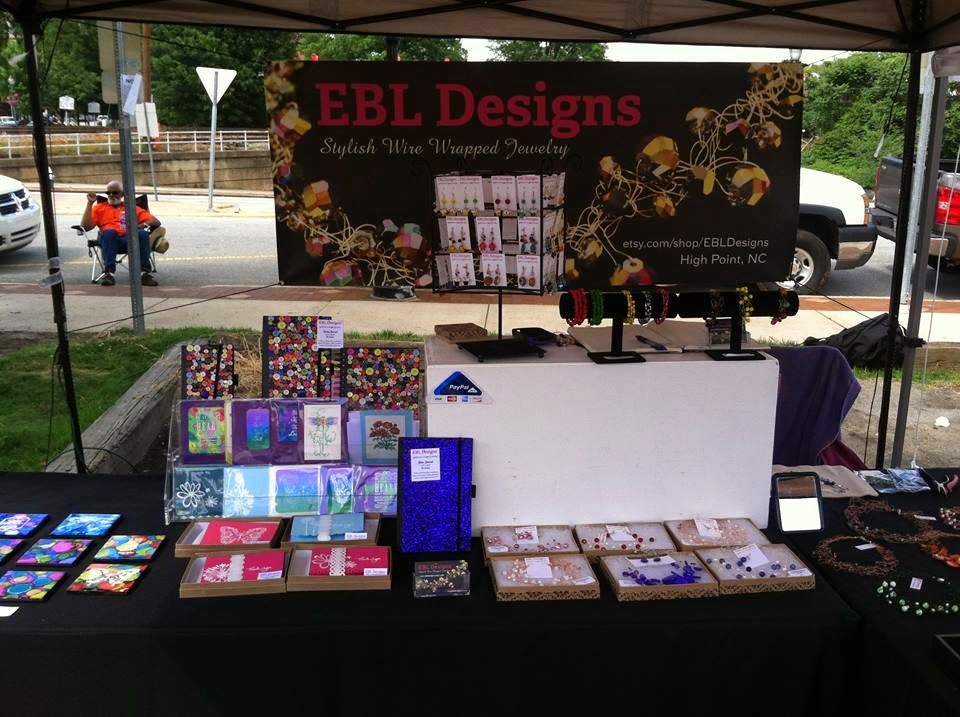
What’s your business name and your name(s)?  EBL Designs and I’m Elizabeth L’Eplattenier.

Can you share anything new that you have been working on since the last article?
I've been experimenting a lot with alcohol ink on ceramic tiles.  I really love how you can’t make a mistake in this median and that you really don’t always have control over how the ink moves.  It takes patience but the results are AMAZING.  I taught a group of ladies at the June Handmade Triad meeting how to make these tiles.  Everyone really enjoyed the experience and making them is really simple!


Alcohol Ink Tile Coasters

Supplies:

My supplies

Example of ceramic tiles
So let’s talk about those supplies.  You don’t have to spend a lot of money on your tiles, in fact, I usually pay about $.15 each for mine at Home Depot (plus I buy them in bulk online and pick them up in the store – LOVE THIS OPTION!)

Tim Holtz Adirondack Alcohol Ink
I like using the Tim Holtz Adirondack Alcohol Inks – they come three to the pack and are sold at your local craft store (can we say coupon?) for about $9.99.  I’m sure you can use any brand of alcohol inks, but I like to use what I can find (BTW- there are some tutorials out there on how to make these tiles using Sharpies, but I have never gotten it to work for me).  

I also like using the Ranger Adirondack Alcohol Blending Solution while others prefer the rubbing alcohol.  To me, the rubbing alcohol can make the inks gritty, so it’s worth the $5 for the blending solution. I use the rubbing alcohol to clean my tiles first to make sure I have the cleanest surface before dropping the ink – again, things can get gritty if there is any dust or debris on the tiles.  The rubbing alcohol is also useful if you get the ink on your hands or clothing – it may help lift the stain if used immediately (but wear old clothing just in case). 

I recommend wearing gloves.  Mine are a set of dish gloves because I feel like I can get a better grip on the bottles and the tiles with them rather than the latex gloves.  I will say, I didn't wear them for the majority of this project (it was hot…) and I’m sporting some colorfully stained hands and nails today.  If you don’t mind this “artist” look for a few days – go for it! 

The paper towels are for excess ink and clean up.  The card board, wax paper and plastic table cloth is to protect you, your furniture and everything else in your home.  This is a messy project that leaves lasting stains and can even take the varnish off furniture (you should see my kitchen table – it’s not pretty).  I actually spent $3 to upgrade to a vinyl table cloth with a felt back – no ink has made it through yet! Plus with the card board, it easy to move the tiles to another location while drying and transporting them outside to use the sealant, you know, in case you actually want to use your kitchen table for something other than arts and crafts. 

The black paint or Sharpie is to finish off the edges of the tile to make it look more crisp and finished.   If you’re using the tiles as coasters, you’ll need to use a sealant.  If not, the ink will flake or scratch off.  You can glue felt onto the bottom of the tile to keep from scratching your furniture.

This is a fun project to work on and is easy to do, but it is time consuming because you have to wait in between steps.  It usually takes me 3-4 days to completely process a batch of these tiles.

Onto the project!

1. Clean your tiles with rubbing alcohol and paper towels. You can also paint the sides of your tiles with the black paint or wait right before putting the sealant on the tiles.  If I have my paint out, I’m painting as much as I can to make future processes easier.  It is also why you’ll see some of the tiles with the black edge and some unfinished.
Prepped surface with wax paper covered card board and prepared tile.

2. If you haven’t already, put down the plastic table cloth onto your work surface.  Line your card board with wax paper and place a couple of tiles onto it.  I like to work with more than one tile at a time – it’s faster when you’re making batches.

3. Next, put on your gloves.  I like to work with only ONE color at a time when using the inks, that way I don’t mix up the caps or forget to put the cap back on and knock over the bottle.

Shows first color and how the ink blooms

4. Select the color that you would like to use.  Gently drop one drop of ink at a time onto the tile.  Think of it like food coloring. Keep it spaced out – the color will bloom and spread (well, most of the time).

Second color added and bloomed. Notice that ink isn't spreading as well on second tile.

5. Next, add the second color and so on until most of the tile is covered.  Remember, a little ink goes a long way and this is just the base color. Keep adding color until most of the tile is covered.
Notice the white flecks on the second tile

6. You might notice that you have white “flecks” on your tile where the ink is not absorbing.  This could be a flaw in the glaze, etc.  It’s okay, the next steps should help cover it, but sometimes, you just have to let go and live with the white spots…


7. Using a bunch of paper towels, gently blot the ink on the tile to help pick up the excess ink and to cover the remaining white areas.  Work fast because the ink will dry quickly.


8. Repeat steps 4-5.  If you like the results, stop you’re done.  Or you can use the Ranger Adirondack Alcohol Blending Solution or rubbing alcohol for a different look by dropping small amounts onto the tile (like the ink) and watching it bloom.  I like to wait a few minutes for it to dry and then add more ink.  This will help give you that "in depth" layered look.  At some point, you will need to walk away from the inks.

9. Let the tiles dry for a few hours, but preferably, overnight to 24 hours is best.  If you spray the sealant and the ink isn't dry enough, it could cause the ink to run.

10. If you have not already, paint the edges of your tiles or use the sharpie. When painting, I also like to paint a little of the back as well just in case the felt doesn't fully cover.  Let the paint dry.

Coasters after sealant spray

11. Next: READ THE DIRECTIONS ON YOUR CAN OF SEALANT.  They may be different than mine.   When using the spray clear sealant, it’s best to work outside (even though the can says "or in a well-ventilated area").  Working outside can present its own issues such as humidity (don’t try it) or rain.  I usually will spray a good layer of sealant on the tile, wait the few minutes that the can say it takes to dry, then spray a second coat.  Then wait at least the recommended minutes of drying before moving the tiles back inside before moving them inside, but if it’s a nice enough day, I’ll leave them outside for a little while (fumes can be harsh).  When I say moving them inside, I mean move the wax paper covered card board with them on it inside.  DO NOT TOUCH THE TILES FOR AT LEAST 24 HOURS or you may leave finger prints.  I did say this was a lengthy process…

12. 24 hours later, glue the felt to the back of the tile.  I like using Mod Podge for more coverage plus you don’t feel the glue behind the felt like you can with hot glue.  I then take my exacto knife and carefully cut the tile out and use the scissors to clean up the edges if needed.

Note: Mod Podge can take a few more days to dry where as hot glue is pretty much ready to go.

Enjoy your Alcohol Ink Tile Coasters!

As always, do you have any advice for a crafter who is just starting their own business?
Ask questions when you’re at a market to the vendors.  Usually they’re friendly and will help you.  I try to network at every event I’m at because it’s a great way of learning where other markets are, what shows they like working and which ones they don’t.  I have found out a ton of information anything from where to buy business cards and jewelry boxes to how to fill my NC Sales and Use Taxes.

I would also encourage local crafters to come to the Handmade Triad meetings.  These meetings are held on the first Thursday of the month (except for July).  It’s a great place to meet other crafters, ask business questions and try a new arts project.  I’ve learned so much from this group and they have definitely helped push my business in the right direction! To learn more about Handmade Triad, visit their facebook page at: www.facebook.com/handmadetriad

Is there anything else you would like to share?
Take advantage of social media. You might not have or want to open an Etsy shop or a webpage, but customers like to be able to find you online.  Facebook is free and easy to work and it is a way that you can share and connect with your customers when you’re not at markets.

If you’re selling at markets, get a credit card reader.  In today’s Indie Market world, customers expect that you will be able to take credit cards or you’ll miss a lot of sale opportunities.  Some think you are not truly committed to your business if you don't have a credit card reader.  It’s very easy to set up a Square account.  I personally love using the PayPay reader so I can keep all my business money following through one account.

EBL Designs will be a featured artist at the First Friday Indie Market on August 1, 2013.  The market is located on the corner of MLK and Elm St in Downtown Greensboro, NC and is open from 4-9 pm.

To find out more about EBL Designs:


You can find EBL Designs locally at:

Eclectic Calico:
109 W. Murphy Street
Madison, NC 27025
www.eclecticcalico.com  


EBL Designs plans on expanding her collection into more local businesses this fall.  To learn more, please check out the Shop Local section at www.ebldesigns.com.

Monday, July 28, 2014

New Changes to the First Friday Indie Market Website

FFIM has had a few questions lately and we thought it would be helpful to list them and the answers here on the website for you to review.  If you have any further questions, remember, you can always contact us at: firstfridaymarkets@gmail.com.

What’s with all the changes to the FFIM webpage?
Well, technology is always changing and we have to adapt.  Plus we’re working on making our process the easiest it can be both for the vendors and ourselves.  We’re crafters just like you and are learning how to operate the website as we go along.  If you have any suggestions for improvements, please email: firstfridaymarkets@gmail.com.  

Sales and Use Tax ID # (because it’s state law)
It is now required that you have a sales and use tax id number - if you do not, you will not be accepted into the market. You are responsible for collecting and remitting all sales tax liabilities for your business. On the application, you must provide your sales and use tax certificate of registration number. For more information and apply: http://www.dor.state.nc.us/electronic/registration/index.html

You will also need to display your sales and use certificate in a prominent place at the market and submit a copy to us for our records.  You either bring a copy to the market or you can email a scanned copy of your Sales and Use Tax ID certificate to: firstfridaymarkets@gmail.com

This is not our rule, but a requirement of the NCDOR.

Some may be overwhelmed or put off by the thought of having to do these taxes every quarter.  These taxes are not that difficult to do and it’s only one form.  Plus, there are step by step instructions on how to complete the forms and even videos available.  For more information about filing your NC Sales and Use Taxes: http://www.dornc.com/electronic/salesanduse.html

Filing complete applications every time (no “on file”)
We’ve been having issues with vendors filling out the application for the Market and putting “on file” or leaving information blank.  This has been used for the sales and use tax id #, photographs, websites, etc.  Please do not do this – it is extremely hard for us to go back through applications to find the info and a whole lot easier for you to take the moment and fill it in. 

It is especially hard for websites – this is needed not only if you have been chosen as a feature vendor, but also to link your website on the “Our Vendors” page.  You are missing the opportunity for new people to find out who you are by not including websites.  We only include links to websites that have been listed on that month’s application. Websites can include Etsy, Facebook, Twitter, etc.

Tent weights
JUST A REMINDER: Tent weights are a MUST. You can purchase them at any sporting goods store or make your own. There should be a MINIMUN of 20 lbs PER LEG. Please do not use milk/water/cat litter jugs as weights. The plastic they are manufactured from is not substantial enough to be useful, and will disintegrate under stress.  Also, one cinder block is not enough weight to hold the tent.

You will also need to secure the weights properly to your tent.  Just sitting the weights on top of the leg is not enough.  You must tie the weights down – usually with the rope that is attached to your canopy.
                           
We’ll be checking tent weights during the market as a friendly reminder so please remember we’re trying to help you and not judge you for your choice in tent weights.  We have been doing outdoor markets for a while and have seen some pretty scary things when it comes to tent weights.  We’re only trying to protect you, your merchandise, other sellers and our visitors.  For more information about tent weights and how to make your own, click here.

The link to my website on the Vendor page is wrong, doesn't work or isn't there
We link to the website that you have listed on your application, in fact, we copy and paste it.  Please make sure you are putting an accurate web page and it is the one that you would like to be listed on our Vendor page.

Open spots at the Market, but I wasn’t approved
There could be a few reasons why you were not approved to vend at the market.  Did you include your Sales and Use Tax ID #?  This is an automatic denial.  We are required by state law that all vendors have a Sales and Use Tax ID (see above for more information) and we cannot accept a vendor who does not have one.

Do you sell jewelry?  Unfortunately, we can only accept a certain amount of jewelry vendors and usually have a wait list for these vendors.  It doesn’t help anyone at the market if we’re over crowded with jewelry because customers get overwhelmed with the assortment.  It doesn’t matter if every jewelry vendor is different and unique, the customers only see jewelry.  You are more likely to be accepted into a market the earlier you apply.

What about your pictures – do they really show the quality of work you do?  Pictures say a thousand words and really do matter when we need to see what you are selling.  You should make sure that any website link that you provide is up-to-date and show what kind of work you are currently doing.

Where are you from?  While occasionally we’ll accept vendors from outside the triad area, we do try to make sure that our vendors are local.  Sometimes, we may allow a vendor to come to the market from outside of the triad if there is space.

Did you remember to submit your payment either through PayPal or check?  If payment is not received, the application is void.  If you pay through PayPal, you’ll received a confirmation email from PayPal about the payment.  To follow up about a mailed check, please email:firstfridaymarkets@gmail.com.

We’re always open to new ideas and try to implement them when possible.

Thursday, July 24, 2014

Meet Featured Artists Phyllis Groce, Kim Wendt and Jessica Bookin of ParkesHill & Company!


What is your business’ name? ParkesHill & Company and we are Phyllis Groce, Kim Wendt and Jessica Bookin!

What sort of items do you make?
We are a group of three and we make home accessories and children’s clothing. Fun things like crochet cactus, to beautiful pillows, to a trendy top for any little girl.

When and how did you learn your craft?
Kim learned to sew from her grandmother, Phyllis learned to sew from her mother / grandmother and Jessica learned to crochet from a friend. We all have furthered our skills on our own. We love what we create.

Where do you get your inspiration from?
We all love Pinterest. We are also such visual people so we gather inspiration from nature, magazines, bookstores and our love of vintage everything.

How did you get started doing this as a business?
Making things for friends and just wanting more. It is fun to share your vision with other people.

Do you have any advice for other crafters/artisans just starting out?
Do not be afraid to try what you love. Get yourself out there and show your craft. I find that many times the market and what people are really looking for will help guide you. However if someone does not like what you do it is OK, there will be others who love what you craft.

Anything else you would like to share?
The most important thing I find is engaging in conversation. Many times people really want to hear about your product. Also smile and have fun!

ParkesHill & Company will be a featured artist at the First Friday Indie Market on August 1, 2014. The market is located on the corner of MLK and Elm St in Downtown Greensboro, NC and is open from 4-9pm.

Want to see more of ParkesHill & Company?  Visit Third Caroline on Etsy and ParkesHill coming soon to Etsy.